You may think everyone knows how to apply lipstick – what could go wrong? Applying lipstick may seem straightforward, but there’s more than meets the eye to mastering this art.
While it may seem so, it’s not just about slapping on a color. From creating a smooth canvas to achieving a long-lasting result, learning how to apply lipstick is an essential skill that could make or break a makeup look.
This guide will reveal all the tips and tricks of lipstick application. But, you will be surprised that the perfect lip requires more than a top-notch application technique.
It’s all about knowing the nuances of your lips and how your lipstick choice can enhance your makeup and overall look. Good lipstick application also heavily relies on the quality of the product itself.
And while we’re at it, let’s debunk a common misconception here and now – a pricier lipstick doesn’t necessarily mean it’s the best. You’d be surprised how some drugstore brands can outperform luxury ones.
I’ll analyze everything in this guide, from prepping your lips and choosing the right color to post-application tips. By the end of it, you will confidently know how to apply lipstick like a pro!

Understanding Your Lip Shape
Before exploring how to apply lipstick, talking about lip shapes would be incredibly helpful.
Yes, lip shape does matter when it comes to lipstick application.
Recognizing your unique shape lets you choose the best techniques to accentuate your lips, ensuring a flawless lipstick application every time.
Lips come in various shapes and sizes! Some people have fuller upper lips, while others might have a plump lower lip. In the beauty world, you might have heard of shapes like “heart-shaped” or “round” lips, but what exactly do they mean?
And now you are probably going: Okay, all is good. But what is my lip shape?
Well, I have got you covered! I will help you understand lip shapes and determine which one best describes you.
Let’s dive into some common types of lip shapes:
- Full Lips: If your upper and lower lips are both plump, you’ve got full lips. Balance is key here, and you’d want to avoid making them look overwhelming.
- Thin Lips: Thin lips are slimmer, and some clever makeup techniques can give them a fuller appearance.
- Top-Heavy Lips: If your upper lip is notably larger than your lower lip, you fall in this category.
- Bottom-Heavy Lips: The reverse of top-heavy, your lower lip is plumper in this scenario.
- Round Lips: As the name suggests, the upper and lower lips are of similar width from end to end.
- Heart-Shaped Lips: If your cupid’s bow (the ‘V’ on your upper lip) is pronounced, your lips are likely heart-shaped.
So, have a good look in the mirror. What’s your lip shape? Understanding this is the first step to achieving the perfect lipstick application. Note it down; it’ll come in handy in the following sections on how to apply lipstick!
Choosing The Right Lipstick Color
Now that your lip shape is in the books, there is one more thing to consider: lipstick color. Finding the shades that match your style and face is equally important to learning how to apply lipstick.
You may wonder, “What’s the perfect lipstick color for me?” You’re more than eyeing pleasing colors when selecting the perfect shade.
You’re also considering your skin tone, makeup style, and the occasion. Here’s a guide to help you match your lipstick shade with any situation.
Understanding your skin tone is the first step. You likely fall into one of three categories: cool, warm, or neutral.
- Cool tones benefit from blue- or purple-based lipsticks,
- Warm tones favor orange or red-based hues.
- For those in the neutral camp, you’re lucky. You can wear any color.
Don’t know your skin tone? There are several methods to find out which category you fall in.
You can consider which jewelry suits you the most, golden or silver. If your answer is golden, you probably have a warm skin tone. Contrary, if silver is your jam, then you are cool. If both look good on you, neutral is your category.
Another trick is to look at the veins on your wrists. Blue or purple veins indicate a cool tone, green or olive veins suggest a warm tone, while a mix of both means you’re neutral.
With your skin tone sorted out, it’s time to match your makeup style to your lipstick color. Are you more of a minimalist? Nude or subtle pink shades might be your go-to.
If you’re into bolder, more dramatic looks, feel free to experiment with darker hues like plum or red. Remember, the goal is to balance, not overwhelm.
Your lipstick color can vary according to your activities. A business meeting might call for a more understated, neutral shade.
However, a night on the town opens the door to fun, vibrant hues you might not usually wear. In other words, let your occasion guide your lipstick choice.
Additionally, the season can influence your lipstick color. Light, bright colors are great for spring and summer, while darker, richer shades work well in fall and winter.
Let’s BOIL IT DOWN into a few points:
- Identify your skin tone: cool, warm, or neutral.
- Match lipstick to your makeup style: balance, don’t overwhelm.
- Adapt lip color to the occasion: workplace, casual, or party.
- Consider the season: shift toward richer shades in colder months and lighter hues in warmer ones.
Selecting the right lipstick color isn’t rocket science—it’s about knowing your skin, understanding your style, and adapting to the situation. With a little practice, you’ll pair lipstick colors like a pro in no time!
How To Apply Lipstick: The Correct Method
You are all set with the knowledge of your lip shape and the lip colors that complement you. I think you are ready to find out how to apply lipstick like a beauty guru.
Lipstick application can be divided into three main parts: prepping, applying, and after-application. While this may seem like a lot, every step is essential for a flawless outcome.
Let’s dive right in!

1. Prep Your Lips
Right off the bat, you’ll want to start by preparing your lips. You won’t get a smooth, even application if your lips are dry or flaky. You have two weapons in your arsenal to prevent that: exfoliating and moisturizing.
Exfoliate Your Lips
You can use a store-bought or handmade lip scrub to exfoliate your lips. Otherwise, try going over your lips with a soft toothbrush or a damp towel to gently exfoliate and reveal softer lip tissue.
Avoid over-exfoliating your lips because that will lead to skin breaking and bleeding. Stick to once a week, and your skin will thank you.
Pro tip: Lip scrubs often have the benefit of containing nourishing ingredients for plumper and healthier lips.
Hydrate Your Lips
You cannot write a how to apply lipstick guide without talking about lip hydration! Hydrating your lips will create an even canvas for the lipstick to glide on.
Moisturizing eliminates the fine lines in your lips and prevents cracks and flaky bits, leading to a smooth surface.
Opt for a hydrating balm that you’ll always keep at hand reach. Apply it often, and do not hesitate to use it during your makeup routine.
Moisturize your lips and wait five minutes for the balm to absorb fully. Then, continue with the rest of your lip routine.
Use A Lip Primer
If you want to step up your game and splurge on your lip routine, you can invest in a lip primer like the MAC Cosmetics Prep + Prime Lip. It is just like a face primer; it goes before your lipstick to moisturize and keep the color in place.
Use Foundation Or Concealer
This might sound a bit (or a lot) odd, but foundation and concealer are excellent primers for long-lasting results. Just dab a bit of product all over your lips and let it dry. Make sure that your lips are moisturized. Otherwise, the result will be chapped and clumpy.
Pro tip: This method is excellent for pigmented lips. The foundation/concealer will create an even-colored canvas to accentuate and pronounce the lipstick color.
2. Apply The Color
Trace Your Lips With A Lip Liner
Next comes the application of a lip liner. Is this step necessary? Absolutely not. But using a lip liner will give your lipstick a base to adhere to and prevent it from bleeding or feathering outside your lip line.
Lip liner also allows you to carve your lips in the desired shape and correct “imperfections” you don’t like. Here are some tricks you can play with a lip liner:
- If you have thin lips, trace your lip liner outside your natural lip line. Avoid going overboard and over-tracing around the corners of your mouth. Prefer a lip liner close to your natural lip color for a seamless look.
- If you have thick lips follow the opposite method; trace your liner inside your natural lip line.
Don’t shy away from using a liner color that’s a shade darker than your lipstick. It’s a small trick that’ll give your lips depth and dimension.
Otherwise, prefer a lip liner shade that is the closest to your lipstick. This will enhance the lipstick’s color, removing the need to apply too much product.
Apply Lipstick
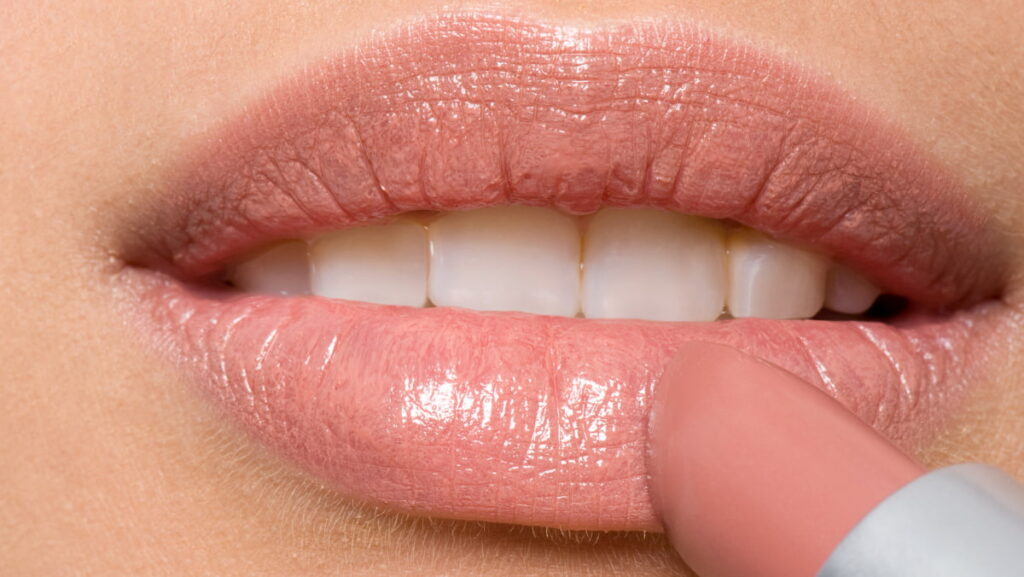
Now, you’re all prepped, and it’s time to apply the lipstick. Start from the center of your upper lip and glide the lipstick towards the corners. Do the same on your lower lip. Fill in the corners and ensure you have an even application.
What if you’re not quite content with just applying your lipstick straight from the tube? That’s where lipstick brushes come in handy. They give you a more precise and controlled application, allow you to blend different lip colors smoothly, and help to minimize product waste.
3. After-Application Care
Even though your lipstick is on, you are hardy done. You now know how to apply lipsticks, but there are numerous methods to learn for prolonging the life of your look, creating a matte finish, or adding volume.
Blot Your Lips
Have you found yourself in the difficult position of smiling with lipstick-stained teeth? I know I have… There is a simple method to prevent lipstick transfer, and that is blotting!
After applying your lipstick, blot your lips with a tissue. It’ll help intensify your lip color and give it a longer-lasting effect. But remember not to rub; just blot gently! If you desire a bolder color, re-apply your lipstick and blot again.
Use Blush For Matte Effect
If you like your lips matte, you can dab a bit of your favorite blush powder to “set” your lipstick. Take a bit of product on a small brush and dab gently to avoid brushing away the color.
This might work best when you are using pink or red shades. Otherwise, it may mix your lipstick’s color.
Use Lip Gloss For Dimension
If you like a glossier, more dramatic look, you can coat your lips with a lip gloss. You can either go with a simple translucent formula that goes with everything or pick a shade close to your lipstick.
Add Shine With Highlighter
I could not talk about how to apply lipstick without referring to this viral makeup trend.
If you want to accentuate your cupid’s bow, add a bit of cream highlighter with your finger or powder with a small brush. The highlighter will reflect the light making your lips more impressive.
Sometimes, when I want to elevate the shine, I go on and dab a bit of highlighter in the center of my lip.
Mind What You Eat And Drink
Greasy foods can break down lipstick readily. Using a straw when drinking can also save your lipstick from wearing off too soon. But don’t be overly cautious! Enjoy life, and just bring your lipstick together to re-apply.
All these tips may have created confusion. Worry not! Each individual will find which practices work best, but ultimately, applying lipstick comes down to a very basic process.

How To Apply Liquid Lipstick
Now, you have learned everything there is to know about how to apply lipstick. The same basics apply to liquid lipsticks as well.
However, applying liquid lipstick has different difficulties and pitfalls compared to traditional bullet or tube lipsticks. Here’s a step-by-step guide on how to apply liquid lipstick effectively:
- Prep your lips: Start by ensuring that your lips are smooth and hydrated. Exfoliate them gently with a lip scrub or a soft toothbrush to remove any dead skin. Apply a lip balm or moisturizer to keep your lips hydrated throughout the process. You can blot any excess shine with tissue paper.
- Use a lip liner: To achieve a more defined lip shape and prevent the lipstick from feathering; you can use a lip liner that matches your lipstick shade. Outline your lips and fill them in if desired.
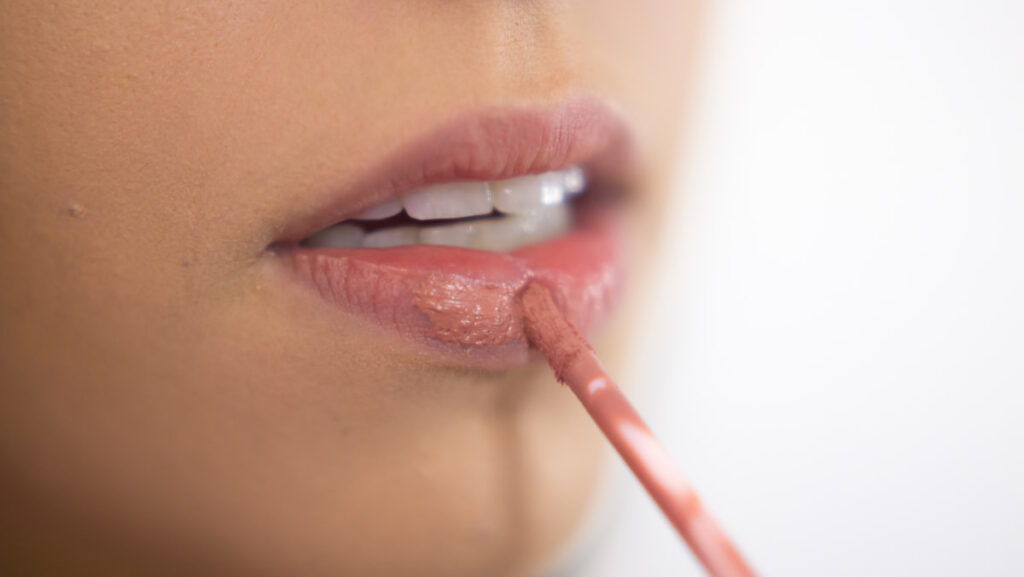
- Apply the liquid lipstick: Start by removing any excess product from the applicator wand by gently scraping it against the rim of the tube. Begin with the bottom lip and apply the lipstick to the center of your lips, following the natural curve. Then, move to the upper lip and apply the lipstick, again starting from the center and working your way toward the corners.
- Fill in the rest of the lips: Once you have applied the initial coat, use the applicator to fill in the rest of your lips, making sure to cover all areas evenly. Take your time and work in small sections to ensure precise application.
- Avoid pressing your lips together: This goes especially for liquid lipsticks with a matte or glossy finish. To avoid any patchiness or unevenness with matte liquid lipsticks, try to resist pressing your lips together until the product has fully dried. Similarly, glossy liquid lipsticks tend to move around a lot, so avoid pursing your lips to prevent smudging.
- Allow it to dry: Liquid lipsticks typically require some time to dry and set. Avoid touching your lips together or eating or drinking until the lipstick is completely dry to prevent smudging.
- Clean up any mistakes: If you make any mistakes or if the lipstick goes outside your lip line, use a clean cotton swab dipped in makeup remover to clean up the edges for a crisp and defined look. You can also go over the spot with foundation or concealer.
- Apply a second coat (optional): If you desire a more intense color or full coverage, you can apply a second coat of liquid lipstick using the same technique mentioned earlier. However, be mindful not to layer too much product as it can feel heavy or flake off.
Now you also confidently know how to apply liquid lipstick. But also, remember to check the specific instructions provided by the manufacturer of the liquid lipstick you are using, as different brands may have slightly different application techniques or formulas.
How To Apply Lipstick: Perfect Your Lipstick Application
My how to apply lipstick masterclass is complete! Consider your new lipstick skills unlocked!
Mastering the art of lipstick application isn’t as daunting as it seems. Once you get the hang of the basics, you’ll find yourself applying lipstick flawlessly in no time.
Applying lipstick is truly an art form that can boost your mood, complete your look, and express your personality. So go out there, explore, and perfect your lipstick application technique.
Always remember, practice makes perfect. Don’t be discouraged if your first few attempts don’t come out as expected. Just keep practicing, and soon you’ll be applying lipstick like a pro!
