Acrylic nails can be the perfect solution when you want to achieve that sleek, polished look without the hassle of frequent salon visits.
Nail enthusiasts often enjoy the convenience and styling options provided by acrylic nails. Fear not; mastering the art of applying acrylic nails at home is completely possible with the right supplies, technique, and patience.
Have you ever wondered how to do acrylic nails at home while still achieving that salon quality? As you embark on this journey, remember that practice makes perfect.
You’ll learn how to proficiently apply, shape, and maintain your acrylic nails, giving you the freedom to experiment with different styles and designs to achieve your ideal look.
By following some simple steps and tips, you’ll be able to transform your nails into stunning works of art.
Stick around and let us guide you through the process of doing acrylic nails at home, so you can say goodbye to costly salon appointments and confidently flaunt your impeccable nails.
How To Do Acrylic Nails At Home
As you may know, I have had acrylic nails done by my favorite salon for years now – never with the intention to start doing them myself.
But last month, one of my nails broke super early on, and my stylist was on vacation. Instead of bothering her, I was like, “I’m pretty sure I can do this myself too.“
I have been watching her do this for four years every single month, plus add some instructions from Youtube and the internet; how hard could it be?!
Based on my nail stylist’s review, after I returned to her with four nails I did myself (they all broke), she wasn’t mad. Actually, I did a pretty decent job! Was it perfect? Oh no, definitely not. Is it impossible to do yourself? Nope, that’s not the case either!
If you’re like me and you need a quick fix while your nail salon is closed, OR if you want to keep doing your acrylic nails yourself (which is way cheaper!), let me walk you through my exact process and share my tips (and struggles) along the way.


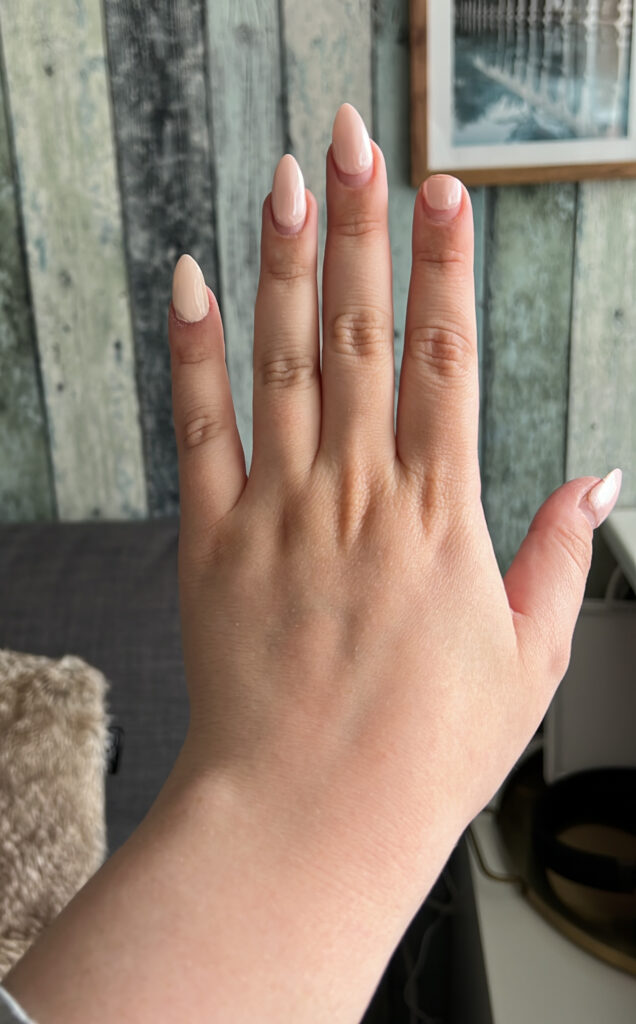
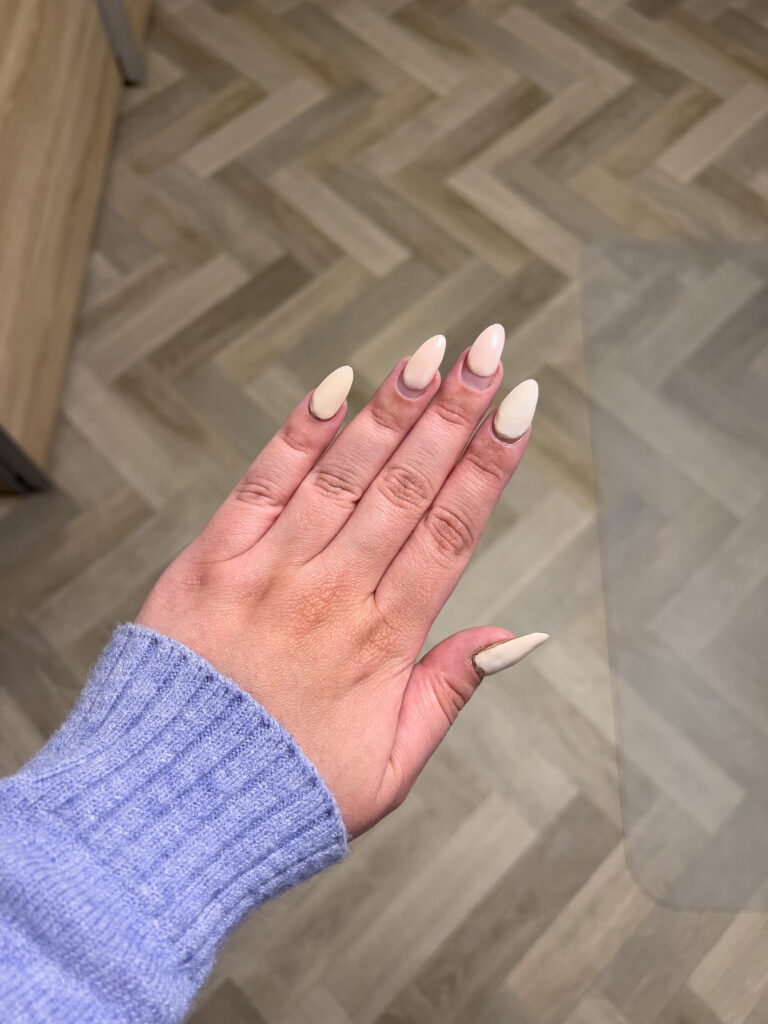
My index fingernail, pinky nail, and thumbnail all broke, and I fixed them all. I forgot to take a photo of my broken pinky nail, and when I took the left picture above, my thumb was still in place lol. But you get the point, lol. My nails were very outgrown; I know they looked ugly, don’t judge me.
Gathering Your Acrylic Nail Supplies
Before diving into the process of doing acrylic nails at home, it’s essential to gather all the necessary supplies. Having everything you need beforehand will make the process smoother and more enjoyable. Let’s go over a list of items you’ll need to obtain first:
- Acrylic nail tips (full cover or half cover): These are the extensions you’ll attach to your natural nails. Make sure you have a variety of sizes to fit each of your nails comfortably.
- Acrylic liquid and powder: These two products are mixed together to form the acrylic you’ll apply to your nails. It’s important to choose high-quality products to ensure the best results.
- Acrylic nail brush: A fine-tipped brush is necessary for applying and shaping the acrylic mixture.
- Nail file This tool will help you shape and smooth your natural nails and extensions.
- Nail Drill machine: This may sound a little scary (no worries though!) but it is an electric file that makes filing a lot easier and quicker. It isn’t necessary but it saves a lot of time!
- Nail dehydrator: This helps to remove oil and moisture from your nails, ensuring the acrylic adheres properly.
- Primer: The primer is applied after the dehydrator to improve adhesion between your natural nails and the acrylic.
- Nail glue: This adhesive secures the acrylic nail tips to your natural nails.
- Nail clippers: You’ll need these to trim the tips to your desired length.
- Cuticle pusher: This tool helps to push back your cuticles, creating a neater appearance gently.
- Cuticle oil: Applying cuticle oil after you’ve completed your acrylic nails will help to nourish and moisturize your cuticles.
- Nail wipes: works well to clean up any mistakes, to wipe off your brush while working or to fully remove nail polish.
- Small bowl: This small bowl is used to hold the acrylic liquid while you work.
- Nail lamp and gel polish: If you want to finish of your manicure with a cute color, you also need to opt for nail polish. I recommend gel polish because this stays on way longer! To cure this, you also need a LED Nail lamp.
Here are some of my favorite gel polishes I’ve reviewed: The Modelones Color Cube Champagne On Ice, the Modelones Solid Cream Gel Polish 21 Colors Vinyl Record In Fall In Love, and the Modelones Gel Polish Set.
Now that you have all your supplies, it’s time to prep your nails for acrylic application. Begin by removing any existing nail polish with a gentle, acetone-free polish remover.
Next, use the nail file to shape your natural nails and gently buff the surface to remove shine. This will help the acrylic bond better to your nails.
After prepping your nails, apply the nail dehydrator, followed by the primer. These steps will ensure that your acrylic nails adhere well and last longer.
That’s it – you’re now all set to start creating your acrylic nails at home. With all the necessary supplies gathered and your nails prepped, you’re ready to move forward with confidence. Enjoy the process, and remember that practice makes perfect!
Preparing Your Natural Nails
Before you start applying acrylic nails at home, it’s crucial to prepare your natural nails properly. Failing to do so may result in lifting, peeling, or causing damage to your nails. Below are step-by-step instructions to ensure optimal results.
- Sanitize your hands: Begin by washing your hands thoroughly with soap and water. This will help eliminate any dirt, oils, and bacteria that may interfere with the acrylic application. Don’t forget to clean under your nails as well.
- Clip and file: Trim your natural nails using a nail clipper. It’s best to cut them short, as longer nails may cause lifting when applying the acrylic. After trimming, file your nails into your desired shape. Remember to be gentle while filing to avoid damaging your nails.
- Buff the nail surface: Grab a nail buffer and gently buff the entire surface of your nails. This will remove any shine and roughen the surface, allowing the acrylic to adhere better.
Here is a brief overview of the steps and their purpose:
| Step | Purpose |
|---|---|
| 1. Sanitize hands | Remove dirt, oils, and bacteria |
| 2. Clip and file | Prevent lifting, shape nails |
| 3. Buff nails | Improve acrylic adhesion |
When choosing nail tools and products, keep these tips in mind:
- Opt for a high-quality nail file to prevent damaging your nails.
- Use an antibacterial sanitizer for the best results, as regular soap may not kill all bacteria.
- Select a gentle nail buffer to avoid over-buffing your nails, which can cause thinning and weaken their structure.
Once you have completed these steps, your nails will be prepared for the acrylic application. Here’s a quick checklist to help ensure you’re ready:
- Hands sanitized – No lingering dirt, oils, or bacteria.
- Nails trimmed and filed – Short and shaped to your preference.
- Nail surface buffed – Shine-free and roughened for better acrylic adhesion.
Applying Nail Tips and Blending
To achieve fabulous acrylic nails at home, follow these simple steps for applying nail tips and blending them effortlessly:
1. Prepare your nails: Before applying nail tips, you need to prepare your natural nails. Start by cleaning your nails with nail polish remover to get rid of any oil or residue. Gently push back your cuticles and trim any excess cuticles. Don’t forget to buff your nail surface to make it rougher and create a better surface for the nail tip to adhere to.
2. Choose the right nail tips: Look for nail tips that match your natural nail shape and size. A good fit is crucial for long-lasting results. You’ll want to have a variety of sizes available to ensure you find the perfect match.
- Tips with full-cover design will conceal your entire natural nail
- Half-cover tips only extend your nail’s length, allowing your nail bed to show
3. Apply nail glue: Place a small dot of nail glue on the inside of the nail tip, right where it’ll come in contact with your natural nail. Be careful not to apply too much glue, as it may spill onto your skin.
4. Attach the nail tip: Press the nail tip onto your natural nail, starting at the free edge and working your way toward the nail bed. Hold it in place for a few seconds, and then let go. Ensure no air bubbles are between the nail tip and your natural nail. Repeat this process for all of your nails.
5. Trim and shape the nail tips: Use a nail clipper to trim the tips to your desired length. You can now shape the nail tips using a nail file. Choose from various shapes, such as:
- Square
- Rounded
- Almond
- Stiletto
6. Blend the nail tips: To create a seamless look, you’ll need to blend the nail tips with your natural nails. Start by using a fine-grit nail file and gently file the seam where the tip meets your natural nail. File in one direction, avoiding any back-and-forth motions that could damage the bond.
7. Buff the entire nail: Once the tips are blended, buff the entire surface of each nail. This will create a textured surface for the acrylic to adhere to, ensuring a stronger bond.
Mixing and Applying Acrylic Liquid and Powder
Before diving into the process, make sure you have all the essential materials handy. With your materials ready, let’s walk through the steps needed to prepare and apply your acrylic nails.
1. Prepare your nail beds
Ensure your nails are clean and free from any polish, dirt, or oil. Use a cuticle pusher to gently push back your cuticles, ensuring a clean surface for proper adhesion.
2. Apply nail tips or forms
Ensure the tips match the size of your nails. Apply a small amount of nail glue on the tip’s edge, then place it onto your natural nail. Hold it down for a few seconds to ensure it adheres well. If you opt for nail forms instead, you can skip the glue and place the form directly under your natural nails.
3. Shape your tips
With your nail tips in place, use a nail file to shape and refine them. This step is crucial for your acrylic nails to have a natural, professional appearance. Also, cutting and shaping them before you apply the acrylic is easier. We will perfect the shape after applying the acrylic; no worries.
4. Apply the primer
Apply a thin layer of primer to your natural nails, avoiding contact with the skin. This step helps to prevent lifting and creates a strong bond between the acrylic and your nails.
5. Mix the acrylic liquid and powder
Dip your acrylic brush into the acrylic liquid, then gently wipe off the excess. Next, dab the brush into the acrylic powder, forming a small bead at the end. It’s important to get the right bead consistency; it shouldn’t be too wet or too dry.
6. Apply the acrylic mixture
Place the acrylic bead near the cuticle area, gently spreading it down the nail toward the tip. Do this quickly, as acrylic tends to set fast. Repeat this process for each nail, making sure the acrylic is smooth and even.
7. Shape and buff your nails
Once the acrylic has dried completely, use your nail file to shape your nails and make them even. Next, use a buffer to buff the surface, leaving a smooth finish.
Shaping and Filing Your Acrylic Nails
Like I already said, it’s the easiest to shape and file your nails before applying the acrylic to your nail tips, but doing this afterward is totally fine too. If you do create the shape before applying the acrylic, you still want to perfect the shape afterward. Here are some steps to get the shape perfectly:
- Choose your nail shape: Before starting, select the desired nail shape. Common options include:
- Square
- Oval
- Almond
- Coffin (or ballerina)
- Stiletto
- Trim excess length: If the acrylic nails are still too long, using a nail clipper to trim them to the desired length is barely impossible after applying the acrylic, so do this before. So I would recommend filing them shorter.
- Select the right file: Choose a nail file with a grit of 180 or higher. A coarser file might damage the acrylic.
- Hold the nail file properly: Hold the file firmly with one hand, and use the other hand to support your nails. Always file your nails in one direction to avoid damage.
- Shape the nail: Start filing from the sidewalls, working towards the center. For a square shape, hold the file perpendicular to the nail. For oval, almond, or coffin shapes, angle the file slightly. Focus on creating an even shape and a smooth surface.
- Check your progress: Pause occasionally to inspect the nails and ensure they’re shaping up uniformly. Adjust your filing technique as needed.
- Smooth the edges: Once you’ve achieved the desired shape, use a buffer to smoothen sharp edges and create a polished finish.
- Refine the nails: Fine-tune your shaping by comparing the nails on each hand. File and buff away any inconsistencies or imperfections.
- Moisturize: After filing and shaping your nails, apply cuticle oil or hand lotion to moisturize the surrounding skin.
Don’t forget to care for your nails by keeping them clean, moisturized, and avoiding excessive pressure on the acrylics. With a little practice, you’ll become a pro at maintaining your acrylic nails in no time.
Finishing with Nail Polish and Top Coat
By this point, you’re nearly finished with your at-home acrylic nails. The final step involves applying nail polish and a top coat to complete your professional look. Here’s how to achieve the perfect finish.
Start by selecting your favorite nail polish color – it’s essential to use a high-quality polish. This ensures the best results and helps your nails last longer.
Before you apply the color, gently shake the bottle or roll it between your hands to mix, as this prevents air bubbles.
Next, follow these steps to apply the nail polish flawlessly:
- Wipe off excess polish from the brush against the bottle opening.
- Place the brush near the base of your nail, but not touching the cuticle.
- Apply light pressure and slowly push the brush towards the cuticle, then glide it down the center of the nail.
- Paint the left and right sides using the same procedure.
- Swipe the brush across the nail tip to seal it with polish.
Don’t forget to let your nails dry between each coat – drying time varies depending on the polish brand. It’s a good idea to wait at least 2-3 minutes before applying the next coat.
Here’s a quick overview of the nail polishing process:
- Apply your chosen nail polish in three thin coats.
- Wait for each coat to dry before moving on to the next one.
- Seal the polish with a top coat for added shine and protection.
When it comes to top coats, opt for a high-quality, fast-drying product or gel polish. This not only provides the perfect finish but also prevents smudging and chipping. To apply the top coat, repeat the same steps as with the nail polish:
- Wipe off excess product from the brush.
- Apply the top coat in thin, even layers.
- Wait 2-3 minutes for the top coat to dry, or put your hands under the LED light to cure and harden the gel polish.
Lastly, nourish and protect your cuticles by massaging them with cuticle oil. This not only maintains their health but also enhances the overall appearance of your nails.
Conclusion: Enjoying Your DIY Acrylic Nails
By now, you’ve learned how to apply acrylic nails at home like a pro. Your new skillset not only helps you save money but also allows you to customize your nails to your liking.
It may seem like it is difficult, but I promise, it’s not that hard! Of course, as you can tell by the photos, my first trial wasn’t perfect either. That’s fine, though; we’re learning something new here!
My nail stylist actually didn’t hate what I did. The base was good, maybe a little too thickly layered, but it wasn’t too bad for the first time. She actually said I got the shape down, haha.
The more you practice, the better it’ll look, so don’t give up after one attempt unless you just want a quick fix before returning to the nail salon. I think a DIY acrylic nail that’s not 100% perfect looks better than a broken one.
Frequently Asked Questions
shop cute nail polish
